Showing posts with label Holiday Cards. Show all posts

Monday, January 23, 2023

Silent Night!

 Hi friends!  Today is my day to share a Kat Scrappiness project.  I am trying to challenge myself to make at least one Christmas card each month this year, as I didn't get any cards sent out in 2022 (sorry!).  I still have several items from the amazing Kat Scrappiness Holiday Release that I didn't get the opportunity to use, so I figured why not! 

The Nativity Scene Die is so beautiful on its own, I wanted to keep the card relatively simple.  To create my card, I did some ink blending to create a beautiful night sky using Distress Oxide inks, and some splattered water. 
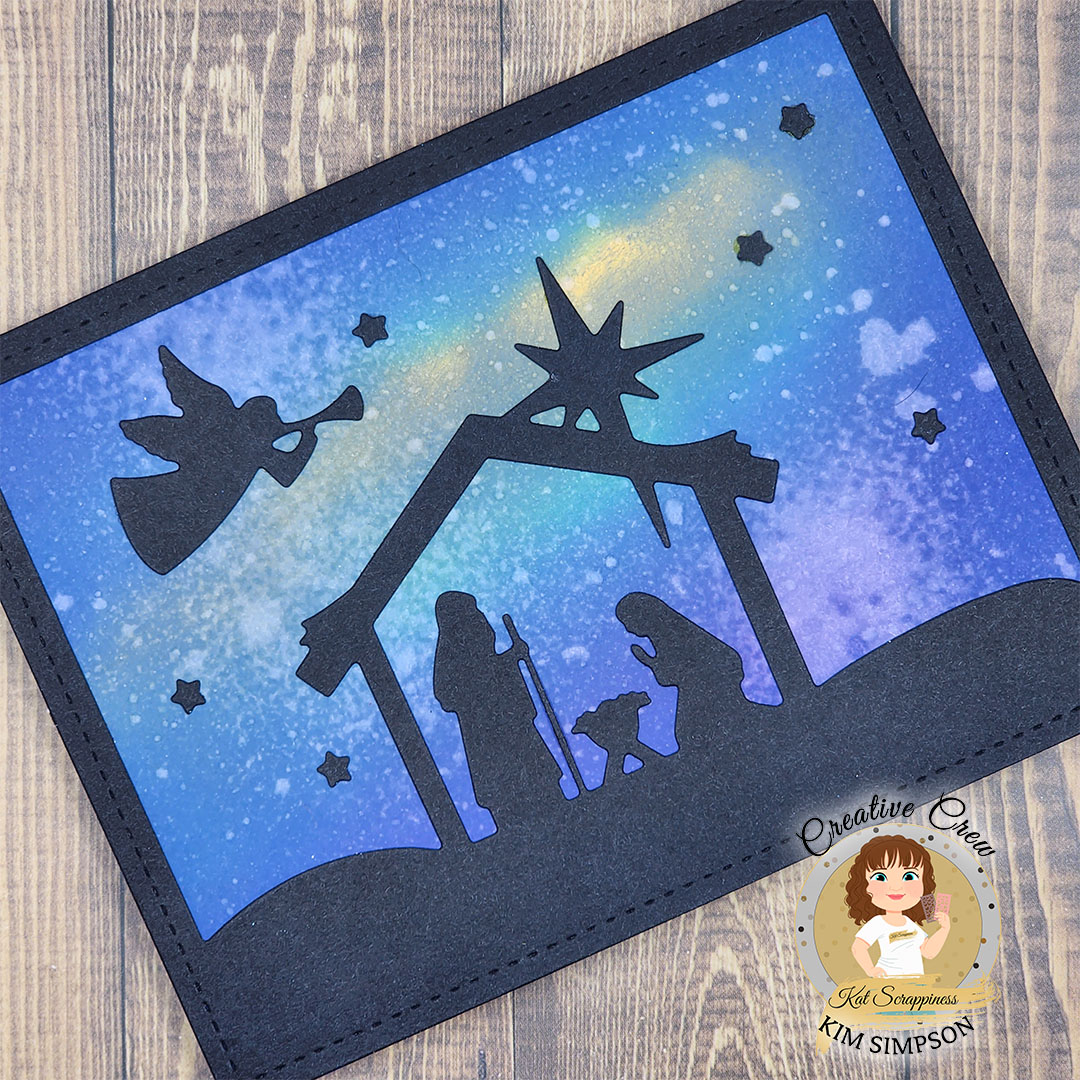
I die-cut the nativity scene in black card stock and adhered the ink-blended panel behind it.  I then adhered the angel and the stars to the ink blended panel.  I did not add a sentiment, as I was really afraid it would take away from the beautiful scene.

I know this card is simple, but I just love it!  I hope you love it to!  Make sure to head to the shop and check out this beautiful die set.  Remember, it is NEVER too early to start creating your holiday cards! 

Thanks so much for stopping by! 

Xoxo, Kim

**Affiliate links provided at no additional cost to you.  Thank you so much for supporting my hobby!**


Saturday, December 24, 2022

Warm Winter Wishes from Spinach & Ramona

Hello again, friends!  This is almost my last Christmas project, I promise!  

The first stamp set that I ever purchased from Prickley Pear Stamps was the darling Frog Pals - Spinach and Ramona stamp set.  I love this stamp set so much, and even more so after Sharon shared with me that Spinach and Ramona are their granddaughter's pet frogs!  How cute is that?    Anyhow, I was dying to dress them up for Christmas and create a card with them.

I colored them with Copic markers in traditional Christmas colors and added some gold accents using a gelly roll pen. I cut them out using the coordinating dies and set them aside. 

I created a layered tree using my Cricut, and I added some sparkle embossing paste that is nearly dried up to add snow.  I am loving the consistency of it for winter scenes, so I can't bear to throw it away, even though it is on its last leg.   
I tore two strips of white paper to create hills, and added the embossing paste to them, and set the wet items aside to dry completely.   I dry-embossed a white panel using a snowflake embossing folder from my stash and layered the panel on a piece of patterned paper.
I heat embossed a sentiment from the Santa and Rudolph stamp set and backed it with red glitter paper.   I adhered all of my elements to the card front and completed my card by adding some glass bubbles and a bow from my favorite ribbon.  I have had this ribbon in my stash for probably 20 years.  How crazy is that?! 
I have to say that this is my absolute favorite card that I have ever made!  I love all of the different texture, and of course the sweet frogs! 
Make sure to head to the shop and check out this sweet stamp set, and all of the other amazing goodies! 
Thank you so much for spending a few minutes with me!  I hope you love this card as much as I do! 
Merry Christmas to you and yours! 
Xoxo, Kim

**Affiliate links provided at no additional cost to you.  Thank you so much for supporting my hobby!**


Tuesday, December 20, 2022

Ho Ho Ho!

Hello, crafty friends!  I am still having trouble wrapping my head around the fact that there are now only FIVE days until Christmas!  Are you ready?

Today, I am up on the Prickley Pear Blog sharing a fun Christmas card that I made celebrating everyone's favorite roly-poly fella.   

I colored up the sweet Santa image from the Santa and Rudolph Stamp Set, cut him out and set him aside. I wanted to keep a lot of white space on my card, but also wanted to incorporate traditional Christmas colors, so I die-cut a bunch of greenery and berries using some dies from my stash.
I dry-embossed a white card panel using a brick embossing folder that I have in my stash and have never used.  Can you believe it?  It was the perfect backdrop for Santa!   (Check out the last photo to really see the embossing.)  I backed the embossed panel with some red glitter paper and adhered it to my card base.  I stamped the "Ho Ho Ho" sentiment from the stamp set and backed the sentiment strip with the same red glitter paper.
  I set about to arrange the greenery and berries on the lower portion of the card and when I was satisfied, adhered them down.  If you have never tried Glad Press 'n Seal, it is my favorite trick for working with clusters of embellishments.  Once you have them arranged, you lay a piece of Press 'n Seal over it, gently rub your hands over it so your cluster sticks, and gently pull it up.  You can then add your favorite adhesive and adhere it to your surface.  It prevents them from moving around too much.  This was a total game changer for me. 

Once the greenery was down, I added the sentiment strip and Santa, and I finished my card with some red bling. 
I hope that this inspires you to get crafty today!  Make sure to head over to the shop and check out all of the amazing products! 
Thank you so much for hanging out with me for a few minutes! 
Xoxo, Kim

**Affiliate links provided at no additional cost to you.  Thank you so much for supporting my hobby!**


Oh, Come Let Us Adore Him!

 Hello, crafty friends!  Can you believe that there are only 5 more days until Christmas?  I am in panic mode.... but I do this to myself every single year! 

The Artful Angel Design Team is bringing you the 12 Days of Christmas.  Hopefully, you have caught the other amazing projects created by the Design Team!  

We were asked to use any previously released stamp sets to create a Christmas card, and of course, I had to use the sweet camel from the 8 Crazy Nights Stamp Set!  I colored it with Copic markers, cut it out and set it aside. 


I paired him with some traditional Christmas colors, and of course I had to add sparkly paper, because who doesn't love a little sparkle, especially around the holidays!  I dry-embossed a white panel using an embossing folder from my stash, wrapped it with some metallic red embroidery thread and adhered my card panels to the card base. 

I heat embossed the beautiful sentiment from a retired Stampin' Up stamp set, that I felt was perfect to pair with the camel.  Lastly, I added a red loopy bow.  I didn't want to add any other embellishments, as I love the pristine look of the card! 

I hope that you are more prepared for the holidays than I am! 

Thank you so much for stopping by! 

Xoxo, Kim


Tuesday, December 13, 2022

Deck the Halls!

Hi friends!  I am back again with another Christmas card to share using the You Are Loved Clear Stamp Set from Prickley Pear Stamps & Dies.  I really, really love making Christmas cards, so you will be tired of hearing from me by the time Christmas gets here! 

I love everything about this stamp set, and I wanted to create a card that showed nature celebrating.  I colored the image with Copic Markers and cut it out.  I added white embellishments using a Posca Paint Pen and when it was dry, I added some sparkly white embossing paste to the tree, stars, hats, and base of the tree.  
I used a dome-shaped die to die-cut the center of a white panel, and then I dry-embossed the panel.  I used a night sky digital paper inside the dome.
I heat embossed the sentiment and backed the panel with glitter card stock.  I adhered the image to the card base, added a bow of red and white metallic embroidery floss, and added some bling.
I hope you love this card as much as I do!  Make sure to stop by the shop and check out this sweet stamp set!
Thank you so much for hanging out with me for a few minutes! 
Xoxo, Kim

**Affiliate links provided at no additional cost to you.  Thank you for supporting my hobby!**

Sunday, December 11, 2022

The Stockings Were Hung by the Chimney with Care

 Hi crafty friends!  I hope your weekend is off to a great start!  Does your family hang stockings?  When I was growing up, stockings were a BIG deal in my family.  My dad traveled a lot for work conferences, and he would fill our stockings with all the silly doo-dads that he brought back, generally office supplies and such, and my brother and I loved it!  As an adult, my grandmother carried on the tradition.  She did a stocking for each of the kids and grandkids and filled them with all of the things that we love! 

When I saw the Stocking 2 Clear Stamp Set, from Prickley Pear Stamps & Dies, I knew that I needed to create with it.  The stockings themselves are just beautiful, and they were so much fun to color up.  As a matter of fact, I couldn't stop at just one card, so I am sharing this beautiful pair of cards today.

I colored the stockings with Copic markers and I embellished them with a gold get pen and a white Postca Paint pen.  Once they were dry, I cut them out and set them aside.  I heat embossed the sentiments and trimmed the panels down before backing them with glitter cardstock.  I dry embossed white cardstock panels, and backed them with the same glitter cardstock and adhered them to my card bases.  I added the sentiment panels, stockings, and added some loopy bows.  To complete the cards, I added some bling. 

These cards bring up so many happy memories.  I would love to hear what your favorite holiday tradition is!  Please be sure to leave us a comment and share!  Don't forget to stop by the shop and check out the Stocking 1 and Stocking 2 Clear Stamp Sets! 
Thanks so much for spending a few minutes of your day with me! 
Xoxo, Kim

**Affiliate links provided at no additional cost to you.  Thank you for supporting my hobby!**


Friday, December 9, 2022

Santa Claus Is Comin' To Town!

Happy FriYAY, friends!  I can't believe how quickly the time is flying!  I am so not ready for the holidays.

Today, I am sharing another fun simple holiday card over on the Eyelet Outlet Blog that I created using several of the amazing products available in the shop.  I used one of the card bases that I created for Kendra's Card Challenge which made it so easy to put this together!  I started with a black card base and a fun piece of patterned paper, followed with green cardstock accents.  I die-cut a cardstock circle and carefully layered Brick Washi Tape over it to create a chimney.

Even though I had taped my die down to the green cardstock, it moved and cut part of the circle edge off, so I trimmed it into a straight line and trimmed the washi circle down to match.  I added Santa (brad) to the "chimney" and popped that circle up on foam dots.  To complete my card, I added Black and Red Glitter Enamel Dots.  I didn't add a sentiment, as I felt the patterned paper did enough.

I am so happy to have knocked another Christmas card out!  I am so thankful for the Eyelet Outlet products that make it so easy to create fun and festive cards without too much fuss! 

Shopping List: 

Santa & Mrs. Claus Brads

Brick Washi Tape

Glitter Enamel Dots - Red

Glitter Enamel Dots - Black

Thank you so much for hanging out with me! 

Xoxo, Kim


Wednesday, December 7, 2022

Merry Christmas from Rudolph!

 Good morning, friends!  I am so excited to share my first Prickley Pear Stamps design team project with you today.  I used the new Santa and Rudolph Clear Stamp Set to create this fun card. 


I colored up this darling little Rudolph with Copic markers and added some white highlights using a Posca Paint Pen.  I cut him out and set him aside. 

I used a fun Christmas knit digital paper that looks so realistic.  I paired it with a dry-embossed panel and some strips of glitter cardstock.  
I also dry-embossed a stitched hexagon to place Rudolph on, and I created a loopy bow and embellished it with a brad that I doctored up by removing the legs and adhering it to the bow with a glue gun.
I don't know about you, but I just love this little fella!  He has to be the cutest Rudolph I have ever seen!  Make sure to head over to the shop to check him out and while you are there, be sure to check out all of the other amazing goodies! 
Thanks so much for hanging out with me!  I hope you are inspired to get crafty! 
Xoxo, Kim

**Affiliate links provided at no additional cost to you.  Thank you for supporting my hobby!**

Friday, December 2, 2022

A Sock Monkey Christmas

 Hi friends!  How are you coming along on your holiday cards?  I am making slow, but steady progress, and today I am so excited to share one of them that I created for Eyelet Outlet!  I have been working through Kendra's Card Challenge and used one of the sketches for this card.

I created this simple card using my absolute favorite brad - the Holiday Sock Monkey!  This little fella is the absolute cutest! 
I paired him with some fun holiday patterned papers, and I tied a loopy bow from metallic embroidery floss and created a button from a Candy Cane Brad to adhere the bow to. (I removed the prongs from the brad using wire snips and used a hot glue gun to add the bow to the back of the brad.)  Lastly, I added my favorite embellishments - Red Glitter Enamel dots.
I love that this card is pretty clean and simple, but not boring!  
Shopping List: 

Holiday Sock Monkey Brads

Candy Cane Brads

Glitter Enamel Dots - Red

Thank you so much for hanging out with me!  

Xoxo, Kim

Kim - Blog - Facebook - Instagram

Wednesday, November 30, 2022

'Twas the Night Before Christmas

Hello friends!  Today, I am sharing the last card that I made for the Kat Scrappiness Holiday Release.  I think this might be my favorite!  

I literally had the best time creating this card with all sorts of mediums!  To start, created a night sky using Distress Oxide Inks.  I also created the snowflake background using a stencil and white ink.  

I die-cut the window pane using the Night Before Christmas Window Scene Dies from the Lumber Yard 6 x 6 Paper Pad to create a woodgrain window frame.  I used the same die to die-cut the night sky panel so that I could paper piece it into the background spaces.  (That was teriffying!)
I die-cut the tree from green cardstock and added the snow using my almost dried up shimmer white texture paste.  The good thing about it being on its last leg is that it has a chunky effect, so it looks more realistic.  I die-cut the star out of gold cardstock, the snowflakes from shimmery white cardstock, and the silhouette of Santa and his sleigh from black card stock and adhered them all in place.
Once all of my elements were adhered to the card front, I finished the card off with a loopy bow.
I don't know about you, but this card just makes me want to re-read Twas the Night Before Christmas!  I am ready for Santa to visit (well, not really... not even a little bit ready!!), are you?
Thanks so much for stopping by!  
Xoxo, Kim

**Affiliate links have been provided at no additional cost to you.  Thank you for supporting my habit... I mean hobby!**


Monday, November 28, 2022

A Poinsettia For You!

Happy Monday!  I am not ready for the long weekend to be over.  Today, I am sharing another card that I made for the Kat Scrappiness Holiday Release.  
I was so excited to use the new Layered Poinsettia Dies.  I love 3-D Flowers and these dies made it so simple!  I started by die-cutting the flower pieces from pink card stock.  I wanted my poinsettia to shimmer, so I pulled out my Splatter Box and used some gold metallic spray.  I never know when to stop, so rather than leaving it spotted, I covered the entirety of the petals with gold.  You really can't tell in the photo, but the flower is rose gold in color.  I did the same with the green leaves but left green showing through.  
I used ink to do a watercolor wash on a piece of white card stock, and added some more gold splatters.  Once it was dry, I die-cut the panel using the A2 Quilted Backdrop Die and adhered the panel to my card base.
I die-cut the Noel sentiment using the Noel Word w/Shadow Dies and made a loopy bow from gold metallic thread.  I adhered the poinsettia to the card front and then added the bow, followed by the sentiment.  To complete the card, I added a handful of rhinestones from the Gold Mine Rhinestone Mix
I really love these layering dies!  It made creating a beautiful flower so incredibly easy!
Thanks so much for visiting today! 
Xoxo, Kim

**Affiliate links have been provided at no additional cost to you.  Thank you so much for supporting my habit.... I mean hobby!**


Saturday, November 26, 2022

My First Noel

Happy Saturday, friends!  I keep thinking it is Sunday, but Yay!  I have an extra day left to do all the fun things. 

Today, I am sharing a fun shaker card that I created for the Kat Scrappiness Holiday Release!  I literally love everything about this release.   There is so many great products that you are covered for literally every kind of holiday project you can think of.

I started with one of the brand new Mini Slimline Full Front Shaker Card Pockets.  I love shaker cards, but I hate fiddling with them and usually mess it up.  These pockets make it so simple to create amazing projects in a flash.  I used a piece of patterned paper from the Lumber Yard Slimline Paper Pad as my background.  I love the look of weathered wood, so it was perfect to pair with greenery!  
I die-cut a whole ton of foliage using the new Christmas Foliage Dies and I sponged some ink on to the leaves and berries to add a little bit of dimension.  I used the Build A Bow Die Set to create a bow and set the elements aside to set about creating the shaker.   Like I said the pockets make it ridiculously easy to do this.  I poured some Glitter Sequin Mix - Christmas into the shaker along with some Christmas Confetti Sprinkles and then adhered the final flap of the pocket down.  
To complete the card, I arranged the foliage and adhered to the front of my shaker, and I die-cut the sentiment using the new Noel Word w/Shadow Die
I really love how this card came together!  I just wish I were a better photographer.  Acetate is tough for me to get photos of... so ignore the glare! LOL! 
Thanks so much for stopping by! 
Xoxo, Kim

**Affiliate links have been provided at no additional cost to you.  Thank you so much for supporting my habit... I mean hobby!**

Friday, November 25, 2022

Walking In a Winter Wonderland!

 Hello, friends!  Today, I am over on the Eyelet Outlet Blog, and I wanted to make sure that I shared this card here, too!!  A week has passed since my last Eyelet Outlet post, and I have made a little more progress on my Christmas cards.  How about you? 

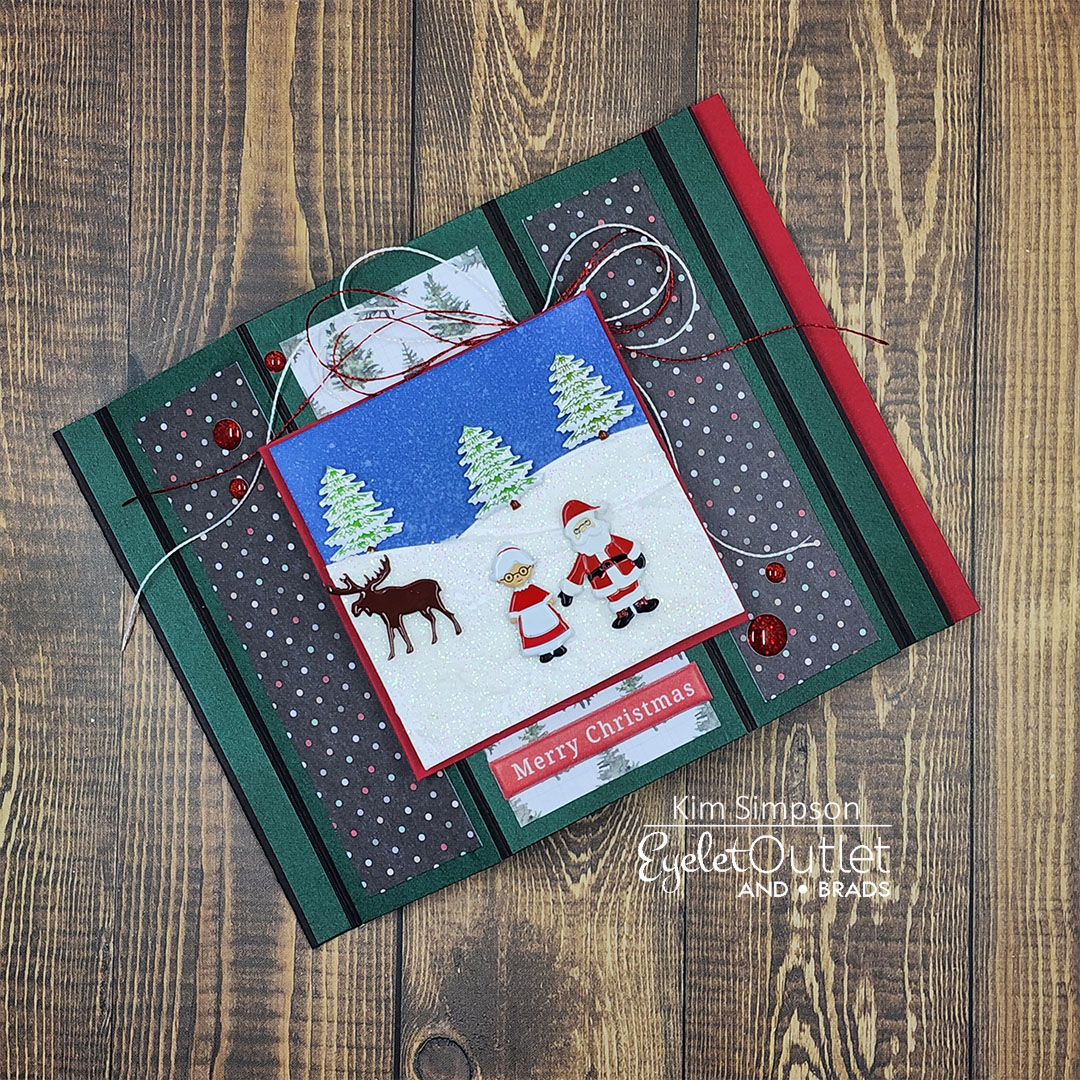
A few weeks ago, my crafty friends @lvhandcrafted, @stamprgrl, and I had the pleasure of doing a Live Mystery Craft Along (MCA) and Linh taught us a new fun-fold technique.   If you missed the live event, you could still catch the replay (Make sure to hit that subscribe button while you are there!)!  I had so much fun creating this Bay Window card (I had never used this fold before) starring a little winter wonderland scene that I made using some of the amazing winter/holiday brads that are in the shop (see my shopping list below for the links).
I started with a square of Bristol Smooth card stock and I ink-blended the entire square using Distress Oxide Ink in Chipped Sapphire.  I did several rounds of spritzing it with water to add the snow fall to the sky.  I die-cut some hills using a die that I have in my stash, adhered them to the square and trimmed the edges off.  I added some sparkly texture paste to the hills.  My tub is nearly dried out, and it has been retired, so I need to find another sparkly paste that I like.
I then added the brads to the panel to create my scene.  To complete my card, I added my favorite - the Glitter Enamel Dots in red!  I couldn't believe how cute this turned out. 
I love this card fold, as it folds flat for mailing, but it stands on its own, and the possibilities are endless!
Shopping List: 

Tree Brads - Snow

Santa & Mrs. Claus Brads

Moose Brads

Glitter Enamel Dots - Red

Thank you so much for hanging out with me! 

Xoxo, Kim

Saturday, November 19, 2022

I Was Framed!

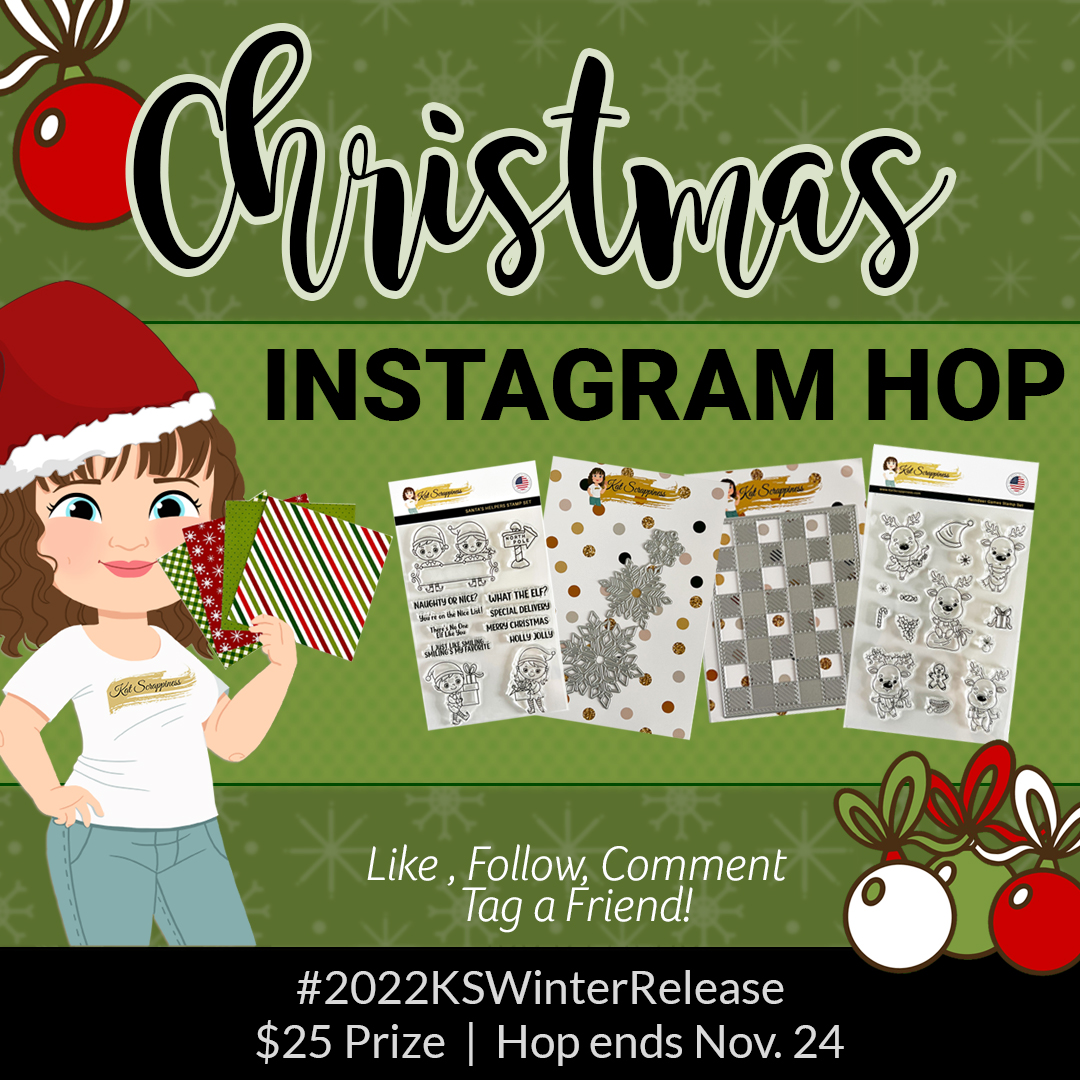
Happy Saturday, friends!  Have you heard the news?  Kat Scrappiness has a brand-new release and I am here to tell you IT IS AMAZING!   The Design Team is celebrating with an awesome Instagram Hop so make sure that you head over and join us and get entered to win a prize! 

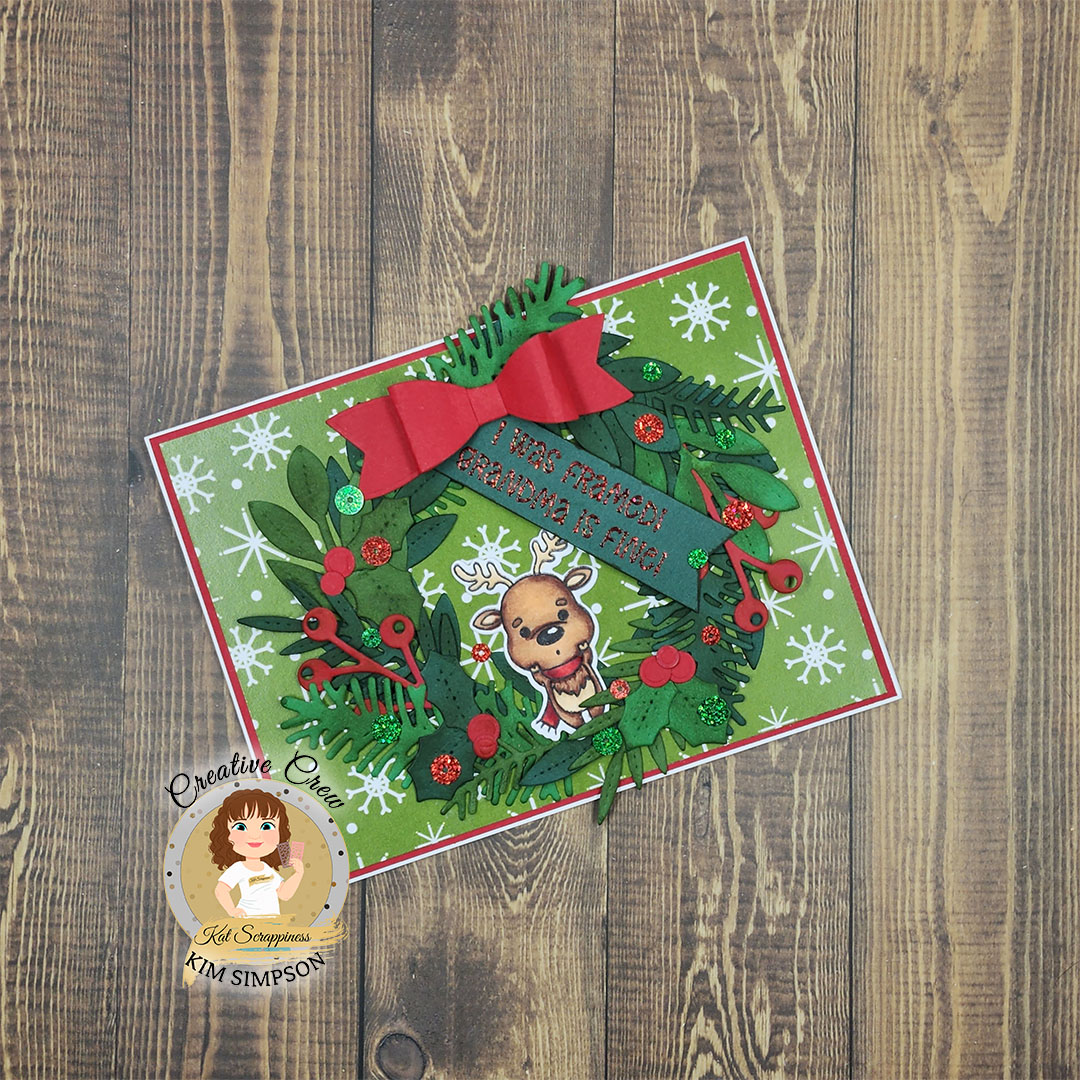
I created this punny card using the new Reindeer Games products.  I absolutely LOVE this collection of stamps, dies, sentiments and papers!  They are the cutest ever! 
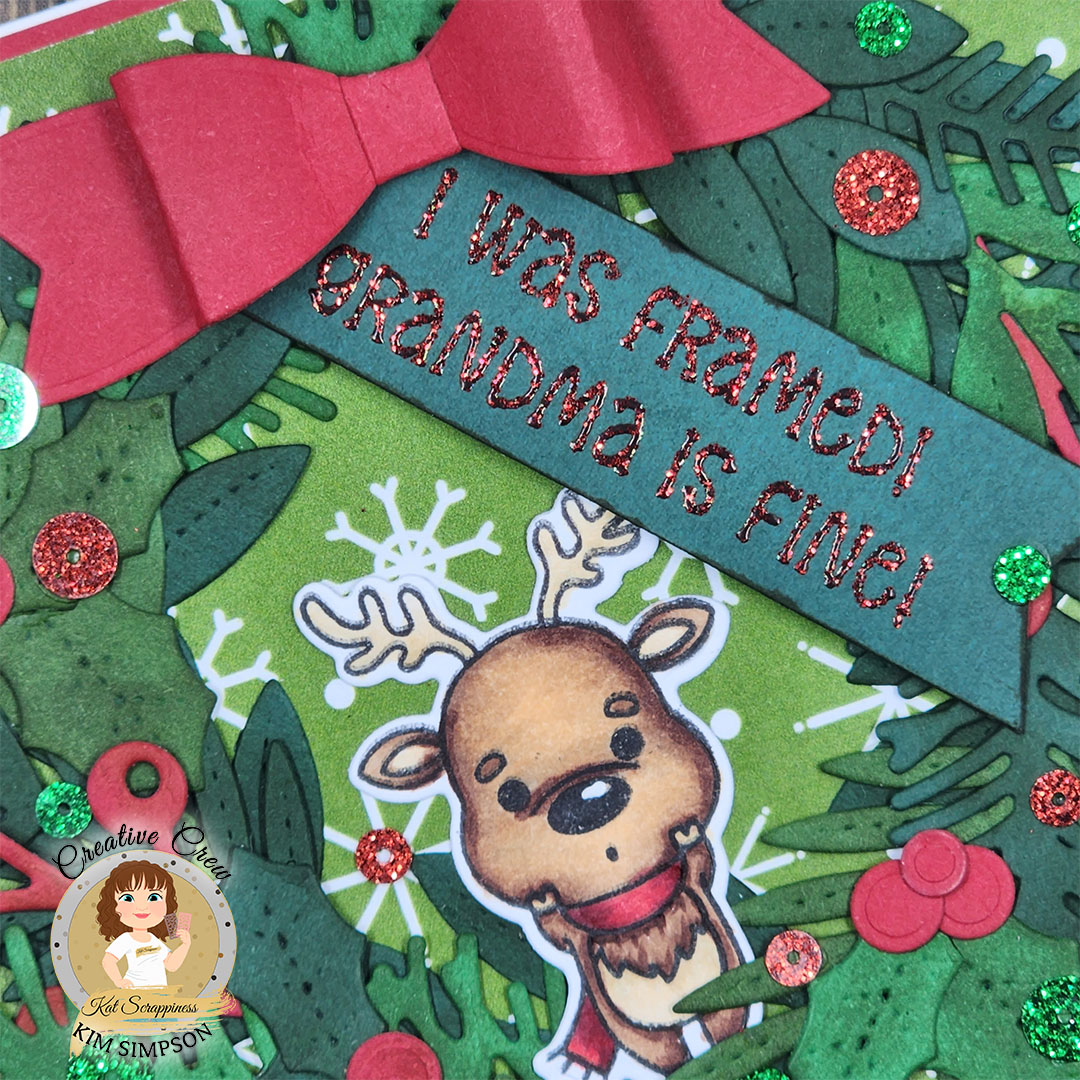
I colored this cute little fella from the Reindeer Games Stamp Set and used the coordinating dies to cut him out.  I die-cut a wreath using the Wreath Die and some foliage to fill it in with the Christmas Foliage Dies.  These dies are amazing!  I love to use sprigs of greenery on my cards, and they are just what I needed.  Lastly, I used the brand-new Build A Bow Die Set to create a paper bow for the wreath.
I used one of the papers from the adorable Reindeer Games 6 x 6 Paper Pad as a backdrop for the wreath and heat embossed one of the sentiments from the Reindeer Games Sentiments Stamps.  I don't know about you, but it made me giggle and got the song stuck in my head.  To complete my card, I sprinkled some sequins from the new Glitter Sequins Mix - Christmas amongst the foliage to add some sparkle.
I am so in love with this card!  I love how the little reindeer looks like he is throwing his hands up in the air and saying "I was framed!"  It cracks me up! 
Make sure to head over to the shop and check out all of the new goodies!  Don't forget to join the Instagram Hop to see the amazing inspiration that the Design Team has created for you and for a chance to with a $25 voucher to the shop! 
Thanks so much for stopping by! 
Xoxo, Kim