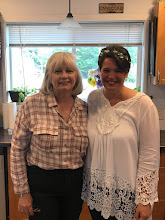
First, I want to wish a very Happy Mother's Day to all of you mamas out there that are killing it every day! You are incredibly strong, phenomenally brave, and your efforts are noticed!
Before I share the card that I made for my mom, I just want to share with you that I have been incredibly blessed to have both a mom and a step-mom who always did their best by me, even when it didn't seem like it... and let me tell you, I was no easy child to raise! I am thankful every day for these two women who helped shape me into the woman I am today.
A while back, I took the Altanew Academy Course - All About Layering 6 - Dies Edition with Lydia Evans. This was a great course and I hadn't yet used any of the layering dies, so it was the perfect opportunity to learn some tips and tricks. I was inspired by Lydia's cut-away card and decided to make my Mother's Day card using this technique.
To begin, I created some sticker sheets from my card-stock using adhesive sheets. This was a game changer, as it eliminates the need to glue detailed layers together, which always ends up in a mess for me. I then die-cut multiple images with the Altenew Craft A Flower: Antique Rose Dies. I left them in place and colored them in using my Altenew Artist Markers, one color for each layer. There was no need to be precise, I literally scribbled the color over my die-cut pieces. Once the ink had dried, I began layering my flowers and leaves up, leaving the adhesive backing on the bottom layer until I was ready to use them.

I adhered a piece of patterned paper to the inside panel of my card. I then cut the front panel at a diagonal (that was scary!!!!) and trimmed it down the scored edge to remove the cutaway piece. I arranged the flowers and leaves on the front panel so that they peek up over the edge and when I was happy with the placement, I removed the adhesive backing and adhered them. Because I had sticky bits hanging over the top of the card base, I couldn't close my card or the sticky pieces would have stuck and she couldn't have opened it. While that would have been pretty funny, I did want her to be able to enjoy the inside of the card too. I used my powder tool to remove the stickiness; however, I wasn't entirely happy with that, as it left a bit of a tiny, so I die-cut two more pieces of the bottom layer of the rose, trimmed them down, added adhesive and stuck them to the backside of the flower.
I stamped my sentiment directly on to the card panel and finished up with some enamel dots that I had made with Nuvo Drops, which I just love. I just create a whole bunch of dots and let them dry overnight and I always have a supply on hand. The cost is pennies to make them!
My mom loved her card and I hope you do too! Please take time for yourself today! Celebrate all of the hard work you do each and every day! Happy stamping!


